How to fix a sink with its jambs ?
An installation according to the type of sink
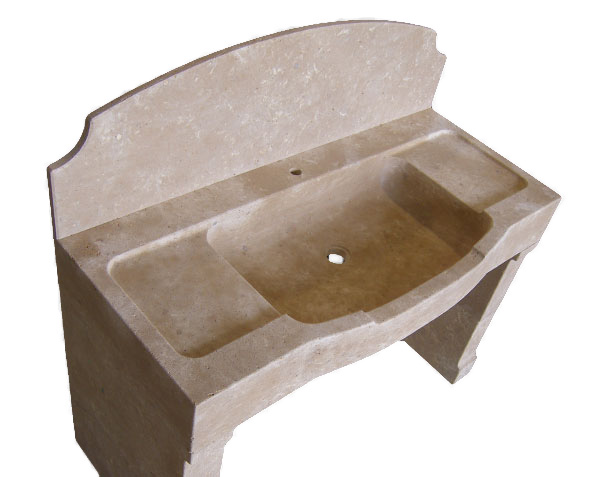
At Comptoir des Pierres, we mainly manufacture stone sinks to lay also called timbre d'office. The expression Timbre d'office has its origin in the 19th century : the word "Timbre" means bowl and the office is the annex room to the kitchen. Its role was to clean the silverware that is not stored in the kitchen.
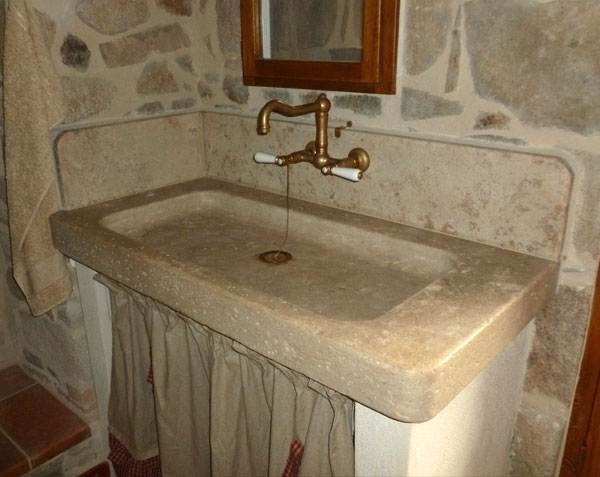
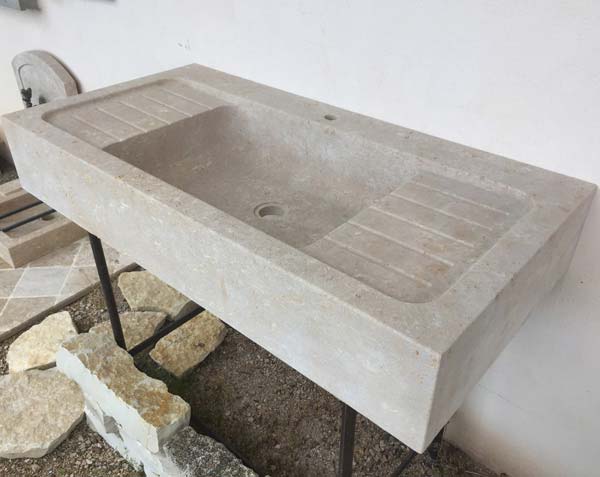
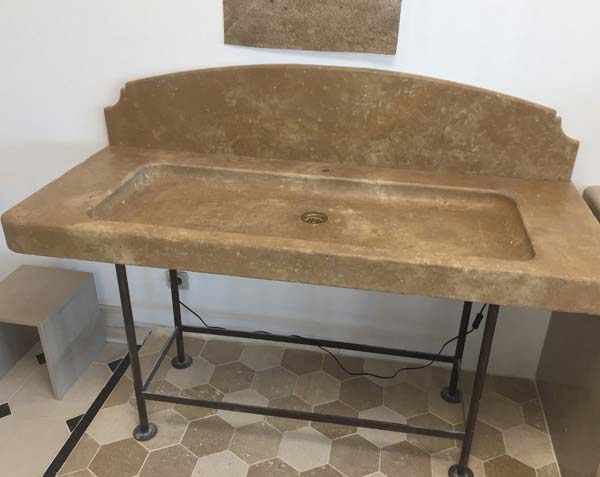
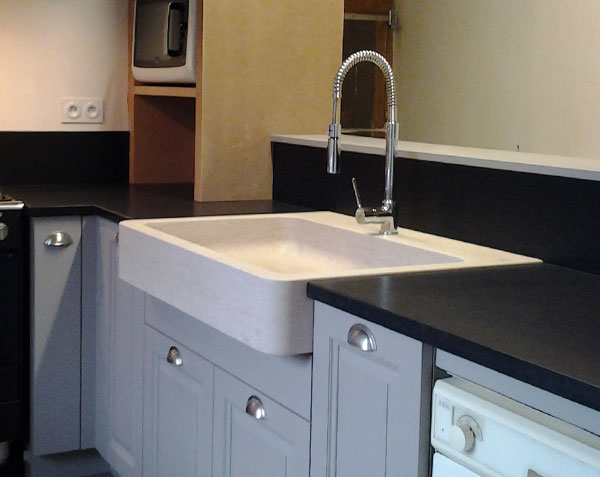
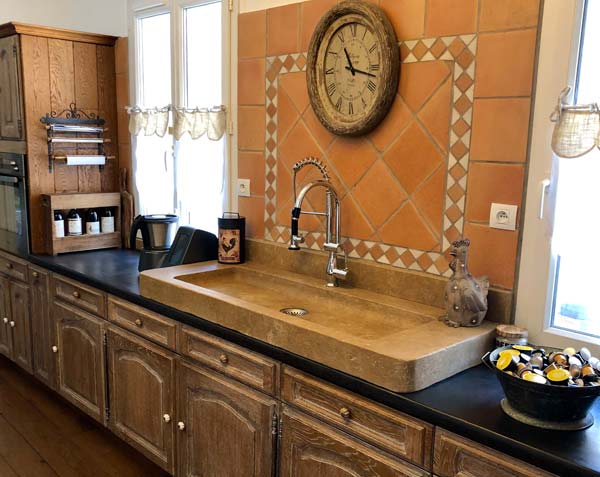
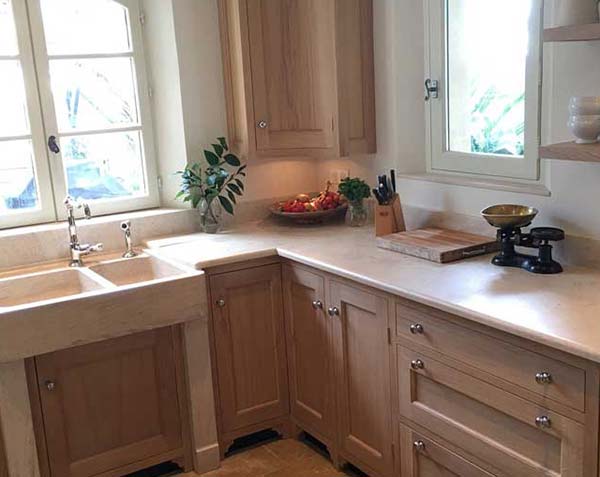
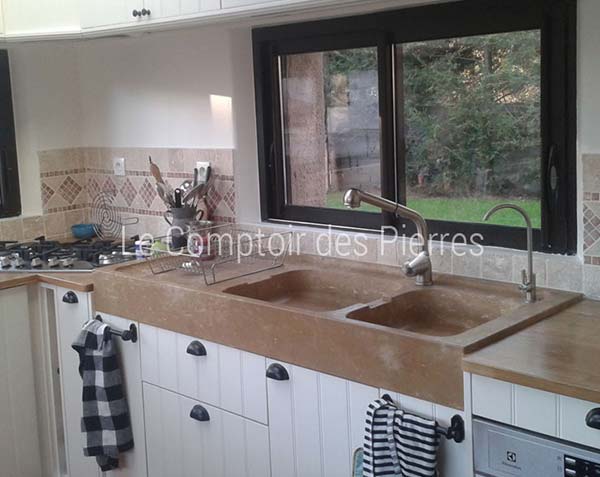
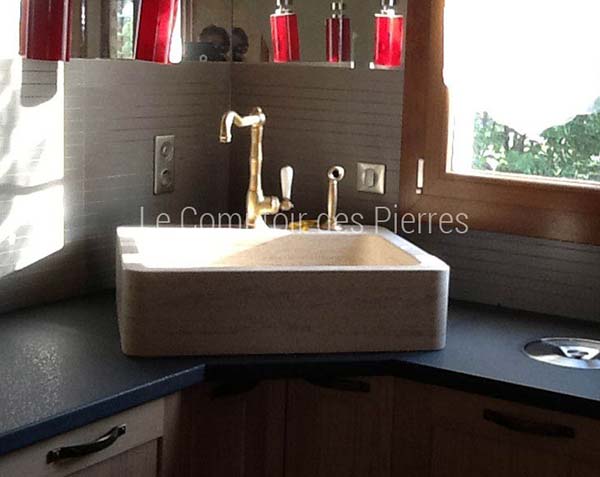
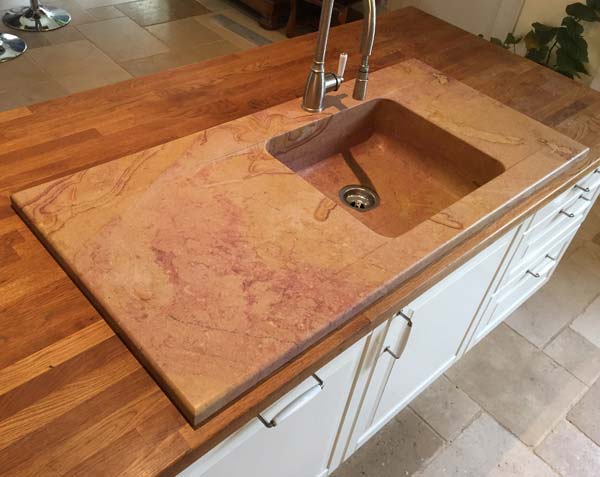
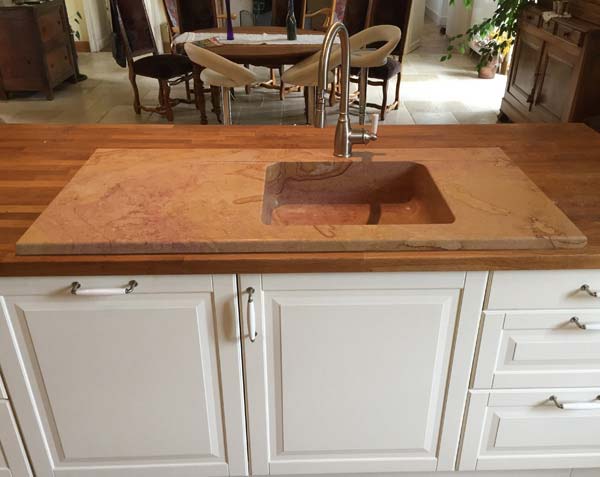
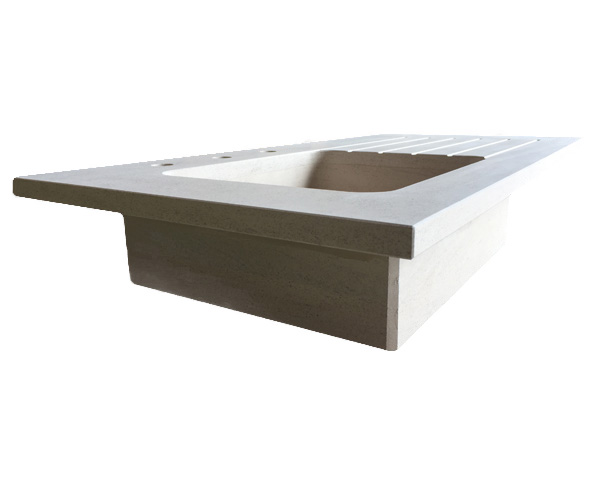
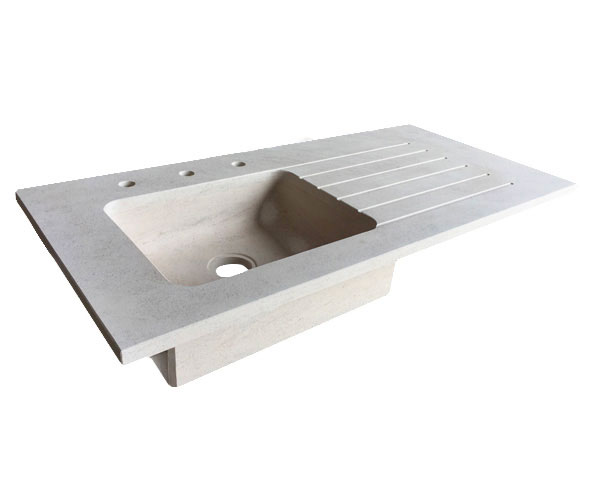
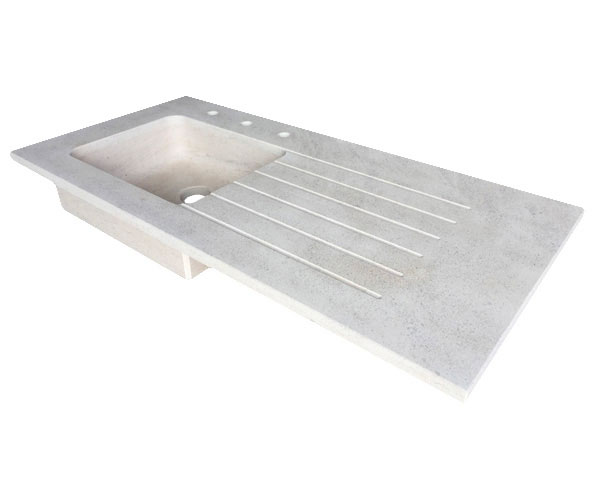
The sink to be layed is today the main demand of our customers. They want to highlight their stone sink by exposing the headband (the front of the sink) in all its height (usually 15 to 20 cm). The sink is a functional element but also a major element of kitchen decoration. These sinks can be placed on a piece of furniture, on stone jambs (or Siporex - cellular concrete - which can be painted), on wrought iron legs, or directly on the kitchen worktop.
The installation of this type of sink is simple, the main challenge is not to underestimate the weight and thus to provide enough people for the installation. The average weight of a stone sink is 100 kg but can go beyond. 3 people seem to us to be necessary to lay the sink in good conditions.
Our customers often have questions about the quality of the furniture that should support the sink. In fact, most commercially purchased furniture supports a stone sink. However, we advise you to check the weight accepted by the furniture (technical sheet). If you buy custom made furniture for your kitchen, detail to the furniture manufacturer your stone sink project, thus the professional can from the beginning of the project provide a reinforcement in the underside if necessary.
We also use the word under-cabinet for the furniture under the sink because the sink is often positioned at the same height as the kitchen plan (85 or 90 cm) ; this thus requires a specific piece of furniture that is lower than the others. It is also possible to put the sink directly on the worktop (think about the tap and bung holes also on the worktop) ; in this case the height of the sink laid is usually 95 or 100 cm (worktop at 85 cm high + sink of 10 or 15 cm).
Having a sink 1 bowl or 2 bowls, with or without drainer does not change the steps of laying. On the other hand, when the sink has a length longer than the lengths of classic furniture (60, 80 or 90 cm), it will probably be necessary to have a custom design of the furniture.
Sinks to install are not the only type of stone sinks. We also make undermont sinks (or fitted sinks). These sinks are also made of massive stone but are also disbursed to fit on your existing plan (or being manufactured at a carpenter for example). These sinks are often significantly more expensive because the volume of stone is identical to a sink to be installed with additional machining work to remove (unload) material.
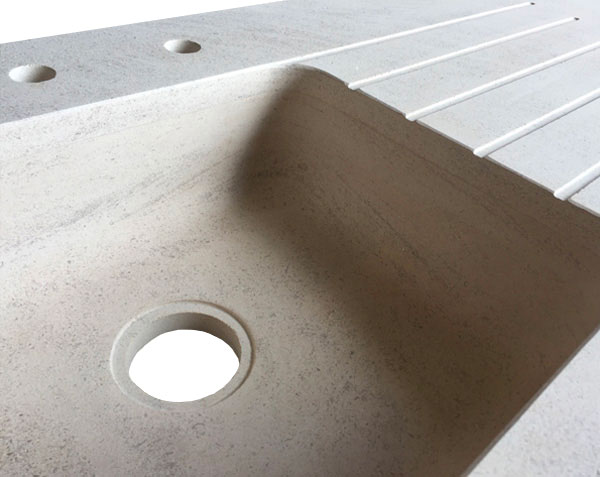
The installation is also simple: it is necessary to come and position the tank of the sink in the drilling of the plan provided for this purpose. When taking ribs, keep in mind that the stone tray will have a thickness of 3 cm on each side thus reducing the useful width of the tank. For all these projects a side plan you will be sent for validation before going into production (after agreement on the quote). The edge of the sink that rests on the worktop is usually 3 cm. It also makes it possible to hide any burrs when cutting the worktop. Once the built-in sink is positioned, you still have the silicone seal to make around the entire perimeter of the sink. This seal will guarantee the seal. It may need to be renewed after a few years.
The simple glue tank is rarer in the world of stone. Indeed the weight of the tank will be held only by gluing and the beauty of the stone will be little seen compared to a sink to be installed or a built-in sink. As part of a tank to be replaced, we rather realize a built-in sink without drainer with edges of 3 cm that will land on the existing worktop. In general, the tanks to be glued are mainly made of stainless steel or resin (with possibly a stone plan with cut to position the tank).
Depending on the projects, we can glue a stone tank under a stone plan, it is equivalent to having a built-in sink made in 2 pieces in our workshop and then assembled by us. We recommend it when the length of the built-in sink is large, so it limits the financial cost.
Indeed in the frame of a built-in sink, we start from a block of solid stone that we then hollow out in the underside. Thus, you pay the volume of stone and the machining time to disburse it. With a tank to glue, the price is that of a worktop of 3 cm (or 5 cm) and a sink 1 tray corresponding to the size of the desired tank.
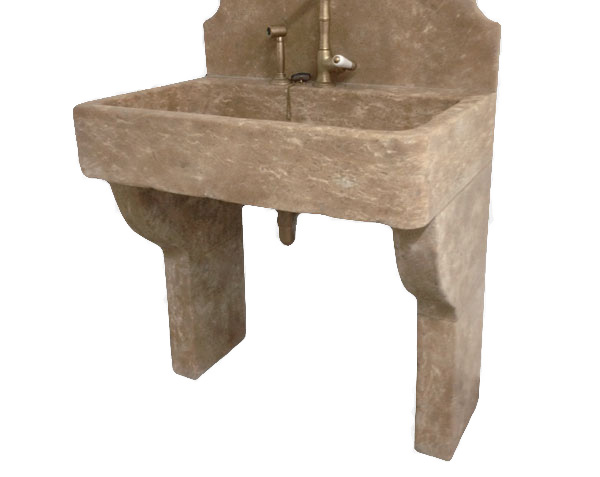
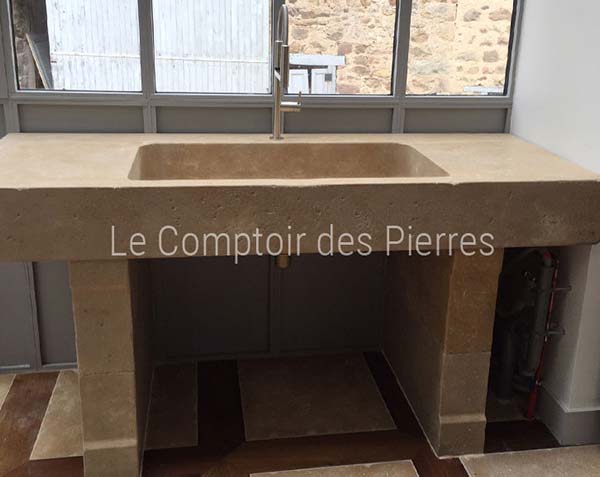
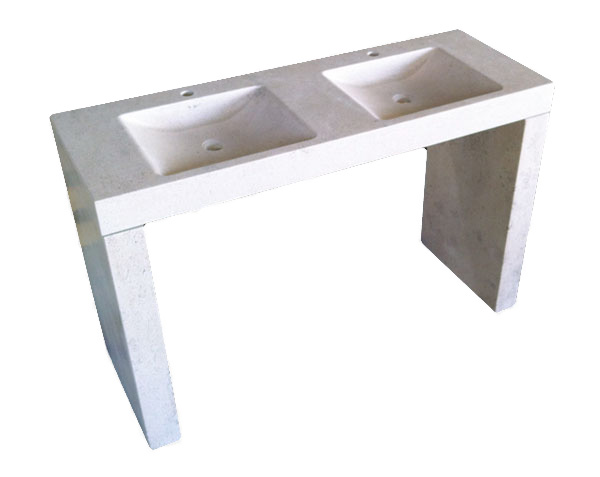
Fix a sink with its jambs
A stone sink with its jambs will probably be the masterpiece of your kitchen.
The installation is very simple: 1-Check that the support (floor) is flat (right) 2- Choose the positioning of your jambs: flush to the right and left of the sink for a resolutely modern rendering or deported to the center of the sink of 10 or 15 cm for a more traditional rendering. In terms of depth, if necessary, think about leaving 5 or 10 cm at the back to pass electrical ducts or water evacuation. For this purpose, our standard jambs are made in depth with 5 cm less than our sinks. 3- Apply a cord of putty sticks to the floor - where you will put the jambs - between the elements of the jambs (as part of jambs in 2 parts), then between the jambs and the sink. The weight of the elements will do the rest, do not put too much so that the putty sticks does not "drool" on the jambs.
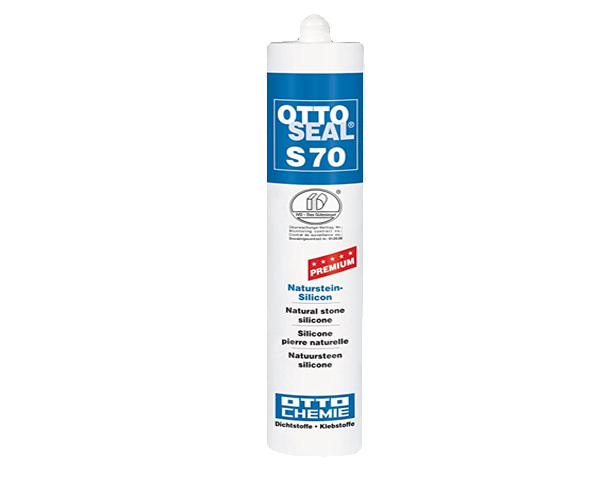
We recommend the following glue sealant : brand Bostik reference MSP 108. This 290 ml cartridge will allow you to glue the elements together. To make the joints between the sink and the worktop (but also with the credenza on the back), we recommend the silicone sealant cartridges of the Otto brand that we market. This product will allow a perfect seal. Choose the right color according to the chosen stone (our recommendation is indicated at the top of the product on our online store). We have designed for you a fixing kit with glue and silicone cartridge.
The space between the jambs can be free or used conveniently in storage space (furniture or curtain masking the stored elements). We can also make a stone tablet with the grooves in the jambs for a turnkey layout. The groove will usually be made in 3.3 cm in height for a 3 cm shelf. You will only need to slide the stone shelf into the grooves. The spacing of the jambs will have to be determined upstream of the order to make the tablet to the right length.

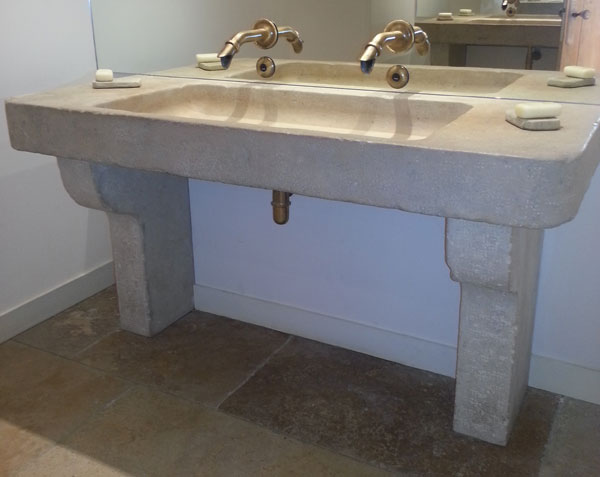

The principle of installation is the same with jambs in cellular concrete or wood. For iron legs (usually in one piece), it is also necessary to fix the support and the sink. To do this, we recommend, in the same way as with stone jambs, the putty sticks. The alliances between stone and wood or iron are often harmonious.
Feel free to reach out if you have any additional questions about installing your stone sink or its production in our workshop. We’re also available to provide information regarding stone countertops.